Saturday, September 26, 2009

Cool Props for the Boo Bash Today


I went back to the Dollar Tree today hoping to find some more of the gory hands, but didn't find any. I had picked up a couple of the feet several weeks ago, but missed out on the hands. They told me that they won't be getting in any more Halloween. I am glad that found all the signs and things from there earlier. They really had a great assortment of things this year. My DD and DN let me out and went down the strip mall to another store, so I browsed around looking at everything and thinking outside the box for ideas for the Boo Bash. I found a couple of nice looking (if there is such a thing--LOL) snakes in the toy section. It says that they grow in water over a period of 90 something hours! I got two in different colors and patterns. I found a gallon jar in my garage that I had forgotten about. I don't have a lid, but will come up with some type of covering for it. I think they will be great for a prop in either the Ye Olde Magick Shoppe in my entryway, the witch's kitchen, or the apothocary area of the screened in porch.I also found some packages of life size flies, bat, locuts and other outdoor critters, and rats and other insects from around the house stuff---all in the toy section. I think they will have a great creap effect in jars. I also got two packages of monster looking teeth (with a set of three in a pack) from the toy section. You can't beat the price.I also picked up a couple of CDs of Halloween sounds and music to test.As I was checking out, the clerk asked me if I was interested in any window clings and I told her I had looked through what they had. She told me that she had a stack at the register that they had trouble displaying. So, I looked through them and picked up a pack of three clings of spiders, a large sheet of 6 glitter spider clings, and a large sheet of spooky glitter clings including a haunted house, cat, spiders, ghoul, witch, bats, etc.I have been looking for a crashed witch to go on the door from the kitchen to the garage. I found one today at the newly opened Spirit Halloween store and one a Target, but they were way more than I was willing to pay. These were all things that attached and were awesome looking, but I just wanted something simple on the door at the end of the long galley kitchen. The kitchen theme is a Witch's Kitchen. At the Dollar Tree I found one package left of a crashed witch wall door decoration! Of course, it is the design on a flat piece of black vinyl, but it fits what I wanted it for and the price was perfect!I was really pleased to find so many things for around $15! We had gone in the new Spirit Halloween store to look around and need I say it was awesome. Expensive, but awesome. I did get some good ideas of how to make some ghosts and how to display some things, so it was a great Boo Bash field trip.We also made a run to my fav thrift store, the Resale Barn, since DD hasn't found a costume yet. They have had a HUGE assortment of costumes and Halloween decor for weeks. They still had a lot, but are winding down. More people are thinking and buying Halloween now. I am so fortunate to have found all my items during the past few weeks before the supply there got low. She didn't find a costume, but I did pick up a cute wodden sign that has an arrow on each end and says: Witch Way? Hurry... They're Coming. The sign was only 99 cents! I also picked up an awesome bottle for potions for 49 cents.I love it and needed another sign for the kitchen door that connects to the entryway. I have another sign that says something about Witch's Way Diner that came from Dollar Tree.All in all, it was a great day of Boo Bash shopping for less than $20.


Friday, September 25, 2009

Spirit Halloween Store Here

Oh my gosh, I just found out that we have a new Spirit Halloween store! They evidently opened up in the old Circuit City builiding last week in our area. We have never had anything like that here and always had to go to the DFW area to find things that Walmart or Target didn't carry.

I was sick this past week and haven't been out, but there was a story about the store in today's newspaper. I am so excited. I am taking my niece and nephew (both 11 years old) tomorrow to look around. Even though I am not looking for anything in particular, it is neat that we have this option and I am looking forward to this as much as the kids. I'm sure that I will find something that I have to buy, even though I don't have much to spend.

Thursday, September 24, 2009

Spooky Type Fonts & Other Resources

Check out this site dedicated to Halloween type fonts. It is called Fontenstein - A Castle Full of Halloween Type. I will be using some of these as I make some last minute props and signs. They will also be fun to use on future invitations for the Boo Bash.


These are all free and the site also includes a very comprehensive set of Ding Bats of all kinds for Halloween. Wow, I wish I would have found this sooner. I may go back and change some things that I have already finished.

I thought the fonts were great, but just wait until you check out the resources at the bottom of the site! This is one of the most comprehensive lists I have found. It has sites that boast of 101 Halloween ideas; how to make and use a scarecrow; Halloween games; an entire cookbook for your party; an online guide for making and using tombstones; ideas for using skulls, skeletons, bones; office Halloween party site; costume party info; scary ideas, safety hints; costumes site; fog machine info; fearful films; how to photograph haunts and parties; high end props; pumpkin carving patterns; Pumpkin Patch site; and even an entire site devoted to creating your own yard haunt.

Wow, I know where I will be spending hours in the coming weeks!

This has become a new addiction. There is so much to see and I am fascinated by all the variables.

Wednesday, September 23, 2009

Ghoul up your photos or become a zombie!

I read somewhere the other day about this feature being available on the K-Mart website and I even went and looked at it earlier this week. I didn't have a photo available at that moment to use that was small enough. I went back to the site tonight and it seems that this item is not available. What the heck? I was excited about getting to ghoul up some photos of the nieces and them just be funny and not too scary.

Anyway, I was looking around tonight at various sites and ran across this site to Zombify your photos. This one is much more graphic than the one on the K-Mart site, but I think it will be fun to do this to each of our photos and print them out to set around the house for the Boo Bash.

Okay, now I feel like an idiot. I just posted the above and then went back to the K-mart site to look one more time. You have to click on the banner for Featured Costumes and it will take you to the site. Click here for a K-Mart direct link to the Ghoul Me site. It is really cute and will make for a fun activity and something to keep.

Tuesday, September 22, 2009

History of the Jack-o-lantern

There is something magical about jack-o-lanterns. They just make me smile and announce that cooler weather is on the way. I have always loved them, but have to
admit to not using them for decor enough.

In our area, the local kids like to steal them and smash them. This is all in the spirit of "fun", but in reality it is anything but fun.Stealing is stealing and this amounts to vandalism of personal property and a massive amount of clean-up that is left to the home owners. So, I usually pacify my jack-o-lantern urges with the faux kind. So, sad, but true.

However, this year, I vow to used real pumpkins at my Boo Bash on the 24th. I will use them in the decor of the BACK yard. LOL

In the meantime, I will spend time online looking at all the wonderful sites devoted to this wonderful art form. Take a peak at this jack-o-lantern site called Extreme Pumpkin for some fun and lots of eye candy.
History of the Jack O'Lantern
The Irish brought the tradition of the Jack O'Lantern to America. But, the original Jack O'Lantern was not a pumpkin. The Jack O'Lantern legend goes back hundreds of years in Irish history. As the story goes, Stingy Jack was a miserable, old drunk who liked to play tricks on everyone: family, friends, his mother and even the Devil himself. One day, he tricked the Devil into climbing up an apple tree. Once the Devil climbed up the apple tree, Stingy Jack hurriedly placed crosses around the trunk of the tree. The Devil was then unable to get down the tree. Stingy Jack made the Devil promise him not to take his soul when he died. Once the devil promised not to take his soul, Stingy Jack removed the crosses and let the Devil down.
Many years later, when Jack finally died, he went to the pearly gates of Heaven and was told by Saint Peter that he was too mean and too cruel and had led a miserable and worthless life on earth. He was not allowed to enter Heaven. He then went down to Hell and the Devil. The Devil kept his promise and would not allow him to enter Hell.
Now Jack was scared and had nowhere to go but to wander about forever in the darkness between Heaven and Hell. He asked the Devil how he could leave as there was no light. The Devil tossed him an ember from the flames of Hell to help him light his way. Jack placed the ember in a hollowed out turnip, one of his favorite foods which he always carried around with him whenever he could steal one.
From that day onward, Stingy Jack roamed the earth without a resting place, lighting his way as he went with his "Jack O'Lantern". On all Hallow's Eve, the Irish hollowed out turnips, rutabagas, gourds, potatoes and beets. They placed a light in them to ward off evil spirits and keep Stingy Jack away. These were the original Jack O'Lanterns.
In the 1800's a couple of waves of Irish immigrants came to America. The Irish immigrants quickly discovered that pumpkins were bigger and easier to carve out. So they used pumpkins for Jack O'Lanterns. (History source: che11eness at http://www.budget101.com/)

Ghostly Jar

In my quest for great items to go in my bottles and jars that will go in the Ye Olde Magic Shoppe, the Witch's Kitchen and the Apothocary at my Boo Bash, I have found some intresting things that can be used from ordinary household items. In addition I have found countless wonderful labels that are ready to print. The only drawback is finding enough bottles and jars and the cost of all the ink to print them. LOL

I hope to make an Eyeball Machine for the Magic Shoppe (link is in the sidebar. I just found this great item that will be a nice wow factor, too.

It is a Ghostly Jar. The object is to have a jar that smokes.

To make it you simply take any glass jar, or bottle, paint it a neon color or black, whatever you prefer.

Light a stick of incense & drop inside the jar and leave it alone.

This gives the effect of a smoking, ghostly jar. It is great for fortune tellers, wizards, witches, etc!

Remember the earlier post about the graveyard scent? You could always use patchouli inscense to achieve this scent.

I may try this out on the screened porch on the apothocary rack. There will be a Dead End Cemetery right outside the porch area. I think it will be a hoot.

Monday, September 21, 2009

Tombstone Epitaphs

I have bought several styrofoam tombstones from Dollar Tree and a resale shop, but I am planning to make some of my own. I have been reading about ways to make them and decided to give this a try. I spent some time tonight researching for some epitaphs to go on them and/or some names that can be used to spice them up.

The ones that I bought all are generic and just have RIP or something along that line. Here is a link to a great site with some that I really like. Here are some spooky epitaphs that will really get a chuckle from Boo Bash participants. This site only deals with names for the tombstones.

My favorites are Berry D. Hatchet and Otta B Alive. Some of them are really corny, some suggestive, or funny or just dumb. They are really worth a great laugh though.

Another fun site I found includes epitaphs that are funny. A few that I liked were:


Here lies an Atheist
All dressed up
And no place to go.

She drank good ale,
good punch and wine
And lived to the age of 99


He got a fish-bone in his throat
and then he sang an angel note.


Here lies Lester Moore.
Four slugsFrom a forty-four.
No Les
No More.

Dragon's Breath Dip

I am still working on the menu for the Boo Bash and ran across this one. It sounds really interesting. I have heard that roasted garlic takes on a unique and wonderful flavor and this recipe seems to uphold that fact. I think I will give it a try for my BB.

By Linda Larsen, About.com
There are two heads (yes, entire heads) of garlic in this dip! (That’s why it’s called Dragon’s Breath). But I assure you, when garlic is roasted, it becomes sweet and nutty. This is one of the most popular dips I have ever served.Ingredients:* 2 heads garlic* 1 Tbsp. olive oil* 8 oz. Brie cheese* 1/2 tsp. seasoned salt* dash white pepperPreparation:Preheat oven to 350 degrees. Cut top 1/2" off the top of the garlic heads. Remove some of the loose papery skin, leaving the heads intact. Place each on a square of foil, drizzle each with the olive oil, and wrap well. Bake at 350 degrees 50-60 minutes, until the garlic is very soft and begins to brown. Cool until easy to handle. Squeeze each head to remove the soft roasted cloves.
In a food processer, process Brie cheese with the seasoned salt, pepper, and garlic cloves. You can also cream these ingredients together using the back of a spoon and a lot of energy. LOL

Refrigerate several hours to blend flavors. Serve with crackers, crostini, and sliced French bread.

History of Halloween

Source: che11eness at http://www.budget101.com/

The History of Halloween Halloween is a modern name that was derived from All Hallow's Eve. According to the history of Halloween, the actual festival was called Samhain (pronounced sow-in) and mark the end of the harvest season after the live stock had been brought in and to signal the beginning of the winter season.It was a festival celebrated by the Celtic Druids which was celebrated on October 31st. This was the end of their year and November 1st was the beginning of the New Year, unlike today where our year ends on December 31st and the new year begins January 1st.Samhain (The Festival of the Dead) was observed in England, Scotland, Wales and Ireland. As evening drew near, they began preparations for the Vigil of Samhain (The Lord of Darkness). It was believed that the veil between the living world and the spirit world was at its thinnest, and that the spirits of the people who had died in the past yearcould cross over and walk the earth once more. Communication with dead kinsmen was also believed to be possible at this time, and that all magical powers were enhanced greatly.The people would douse the fires in their homes, for they believed that evil spirits might find their way in and possess the living. Outside, great bonfires were started by the Druids (bonfire = bone + fire). Now there is great debate of whether they sacrificed humans or not during this celebration. Some say sick animals that wouldn't survive the winter and criminals…believed to be possessed by evil spirits… were burned. Once the fires died down, the Druids would read the bones and ashes left over to divine how the coming year would be. Others say that there is no basis in fact for this ritual. This is one of the mysteries in the history of Halloween that we may never know for sure.The people of the land would light torches from the fire and in turn, would re-light their own hearth fires. The belief was that the fire from the sacred bonfire would keep the evil spirits away, while allowing the spirits of their kinsfolk to find their way home.People would also dress up in furs and scary masks a prelude to our dressing up in costumes. They hoped that the evil spirits would be scared away or would mistake them for animals and wouldn't try to possess their bodies.Another tradition was for the peasants to go door to door, begging for food. The food would be left out to appease the spirits, speeding them on their way back to the spirit world. Whoever gave food would be assured of receiving a prayer from the peasants for good fortunes for the coming year. Those that were stingy received eggs and rocks thrown at their homes, among other pranks. We can see where some of our traditions came from, can't we?According to the history of Halloween, this was also the beginning of the New Year as well, and many activities involving predictions also took place, aside from the bone reading of the Druids. This was a time when fortune telling, tealeaf readings and other divination methods would be the most powerful for the future. One of the fun celebrations we still uphold is bobbing for apples. The Celts believed that the first person to bite an apple would be the first to marry.Another tradition was to peel an apple from top to bottom. The person with the longest unbroken peel would be assured the longest life. If you threw the apple peel over your shoulder, the initial it forms upon landing is the initial of your future mate.In the 7th century, the Romans conquered England and brought many of their own traditions. One of these was the celebration of All Saints Day, which was originally celebrated in May. By the 9th century, All Saints Day was moved to November 1st and All Soul's Day (a festival to celebrate all the dead souls) was added to November 2nd. The Catholic Church hoped that by combining the pagan celebration of Samhain with their own festival they could convert more people to follow the Christine religion. At this point, Samhain became known as All Hallow's Eve (the eve before the hallowed days of All Saint's Day and All Soul's Day). Eventually, All Hallow's Eve was shortened to Hallow E'en and then to Halloween, as we know it today.

Outdoor Haunted Cemetery Scent

Outdoor Haunted Cemetery Scent
Patchouli, Patchouli, Patchouli!!!
It perfectly captures that musty-freshly-turned-earth/fresh flower smell. Get it in oil form as the fragrance will last a long time and a few drops will go a long way. Add a couple drops to tea light candles for lasting Cemetery Scent.

http://www.budget101.com/halloweenpdf/ht37.htm

I'm putting this in my list of sites for planning, but I just had to post about this. Can you imagine the feeling that everyone will get from this????????

Sunday, September 20, 2009

Making Your Own Blood, Scars and Special Effects

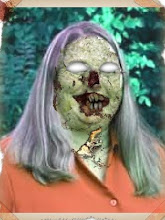
I have already spent quite a bit on props and decor for my first Boo Bash, so I have been looking for economical ways to finish up. After looking around on the web I found the following recipes for making fake blood, scars, scabs and various other wounds or special effects. Most use items that you already have at home. You've gotta love that!

These all were found at: http://www.budget101.com/.

Fake Blood

1/2 bottle of light corn syrup
very hot water
1 tsp of liquid dish soap (Dawn)
red food coloring
blue or green food coloring (optional)
In a small bowl combine the corn syrup and water (just add a little add a time till the correct consistency is achieved. Add your red food coloring, it can be made darker by adding the blue/green.

Store in the fridge. Prior to applying to the skin, apply cold cream. To use: drip, spray or smear as your ghoulish heart desires.....

OR

For blood use blue liquid laundry starch with red food coloring added. It sticks well, it gives the coloration of blood, and dries with the consistency of real blood. Or a mixture of cocoa and water with food coloring, placed in squeeze bottles drips marvelously. Very gory.

OR

For a simpler simulation of blood: mix catsup and face cream!

MYO Blistered Skin Effect
Apply a coating of Vaseline over the area, add white tissues to simulate the look of blisters. You'll need to add more Vaseline


MYO 2nd & 3rd Degree Burn Effect
Ground rouge and then ground charcoal over the top of Vaseline for third degree burns, tissue (either Kleenex or toilet tissue) over the Vaseline and rouge, then possibly torn and lifted up for the blister) for second degree burns; this can also be added for third degree burns. Just don't use the charcoal for the second degree.

MYO Flesh Wounds
petroleum jelly
red food coloring
baking cocoa powder
disposable tissue
bowl
toothpicks

Use a toothpick to mix 3-4 drops of red food coloring into a dollop of petroleum jelly (e.g., Vaseline).
Stir in enough cocoa (a pinch or so) to darken the red color to a deeper, blood-like tint.
Separate the tissue and tear out a small rectangle (3x2 inches) from a single layer of the paper.
Place the tissue at the wound site and cover it with the petroleum jelly mixture.
Carefully mold the tissue into a wound shape, with the edges raised higher than the center of the wound.
Add some petroleum jelly mixture to the center of the wound.
Sprinkle cocoa at the edges of the wound to darken it. Add cocoa to the wound center if a scabby (as opposed to fresh) appearance is desired.
Red food coloring will stain, so avoid wound contact with clothing or furniture.


Make Your Own Fake Intestines

Find an old pair of natural color pantyhose and trim the "feet" off. Carefully fill the hose with cotton or cut up cloth (old bedsheets work well for this). Using a hot glue gun seal the ends.
Randomly twist your intestines and stitch them in various places to make them appear more realistic.
Soak them in the Fake Blood recipe, wring slightly (as it does stain when it drips!). Hang them from a torn shirt, or let them hang out over the top of your pants as though you had surgery that the doctor didn't bother to complete!

MYO Fake Skin
8 TBSP flour 5 TBSP warm water Regular or Halloween face makeup
Mix together the flour and water, this will result in a dough like mixture. Do not add the makeup into the mixture.
Use this mixture and with a bit of regular elmer's school glue it can be affixed to the face or body. Mold the dough or fake skin to desired effect and then let dry. Drying time is at least 10-15 minutes, However after adding the makeup and the fake blood or other gruesome effects the simple skin recipe come to life.

MYO Gore Blood
2/3 cup Oriental 'Cherry' Dipping Sauce 1/3 cup Water1/2 Teaspoon Red Food Coloring 2 or 3 Drops Green Food Coloring Mix the Cherry dipping sauce with water, thoroughly enough to thin down the sauce into a gooey consistancy. Add food coloring. Stir again, and let the sauce sit, preferably in a fridge. When needed, take it out and spoon it onto areas where 'gore' effect blood is needed. The blood will drip in glops & globs, but doesn't puddle out like watery blood does.
(recipe courtesy Jane at Budget 101 forum)

MYO Snot for slime
1 cup cornstarch
1/2 cup water
green food coloring
Mix all ingredients. Great for squeezing through your hands. You can change the consistency by adding more water, then more cornstarch
This makes a great addition to body wounds, color it green and pretend to sneeze. Go dressed as a tissue with boogers in it.


MYO Bruises
deep/dark blue powder eye shadow
charcoal or smoke gray powder eye shadow
sparkling green powder eye shadow
make up brush
Carefully wet your make up brush & blot the blue eye shadow first, applying carefully. Use Q-Tips or your fingertips to add blots of color (gray/ charcoal & blue mix). Touch up around the edges using your green eyeshadow for a gruesome appearance.

MYO Burnt Skin Effect
Burnt marshmallows work excellent for giving the appearance of burnt skin. Burn the marshmallow- peel off the burnt area- open and apply to skin when cool enough to handle.

MYO Scar Special Effect
To easily create the effect of scars, Combine pink & green facial tissues in corn syrup, allow to soak and apply carefully. Let them dry before adding any make-up.
Also, various colors of craft tissue paper work well too.

MYO Gruesome Pus Boil
Get a band-aid about the size of the boil you want. Then, dip some tissue (toilet paper works best) into a mixture of PVA glue and water, and form it onto the band-aid. Make a groove by pushing a pencil about halfway into the tissue. Wait for it to dry and cut around the hardened glue and tissue. Peel the backing of the band-aid off and place it in the desired location. Use makeup to blend it onto your skin.

MYO Hairy Wart Special Effect
Whole peppercorns white or black
Corn syrup or eyelash glue
Hair bristles from a paintbrush or out of your hair brush
Non-toxic watercolor paints or Make-up brush
Keeping the peppercorns away from your eyes, (warts look better on noses and chins), "glue them in place using a little corn syrup or eyelash glue. We've actually had good luck with Elmer's School Glue as well, (It will come right off with a little vinegar). Hold in place until dry.
Carefully dip the ends of your "Hairs" 2 or 3 will do, and hold them in place in the glue/syrup until dry. A hair dryer on low heat will help set them quickly.
You can lightly dust your warts with a make-up brush rubbed in eyeshadow, or you can even spray paint your peppercorns green or gray and let them dry prior to applying.


MYO Scuzzy Face Make-Up
Two paintbrushes
Small saucepan or use 1 c. glass measuring cup in microwave
Cornmeal
Corn syrup
Red or brown water colors or make-up blush
One envelope unflavored Knox gelatin
Dissolve gelatin in 1/4c. cold water in a small saucepan, let set 1 minute, then continually stir over low heat until gelatin/water mix is clear. Allow to cool.
In the meantime, using a paintbrush, paint the shape of your scabs on your "victim" with corn syrup. Carefully cover the entire "scab" cornmeal. Let it set up for 2 full minutes, then lightly blow off the excess. Carefully shade the scab with the make-up colors you have chosen. By now your gelatin mix should be cool, very carefully paint the "scab" with the mix, avoiding pressure so you don't ruin the cornmeal texturing. The gelatin will help seal your "scab" and prevent it from wearing off.


Want to really gross someone out by eating your wounds? Try these:

Edible Scabs & Road Rash
Use Various Flavors of Jello/Gelatin to create edible scabs and road rash effects:
peach, lemon, orange, grape: skin growths, foundation for scabs, blisters, scars
black cherry or cranberry with a teaspoon of grape mixed in: blood, veins, moles, road rash
lime: boogers, pus, various marine life (algae, seaweed)
Plain: create the foundation for scars, scabs and other creations; dribble colored gelatin over the clear, shaped foundation

5 o'clock Shadow
Carefully burn a piece of cork, let it cool for a couple minutes and then rub on your face... or stubble by using used coffee or tea grounds stuck on with eyelash adhesive


These are things that we probably won't use much of this year, but may in future years. It is good to know how to do these things without having to spend a lot of money on make-up or kits.